Wednesday, March 20, 2013

Blur Effect on Photos

Blur in CorelDRAW only works for bitmap objects or object image only, and does not apply to the object curve (vector), besides that this feature is very limited orders, can not give effect to certain parts of the image,


To create a blur effect on the background image we have a little manipulated. For example, the original image as above and we will create a blur effect on the images results as shown below;


Menu blur in CorelDRAW when applied to the original image as shown below, with the limitations we had to blur command can anticipate with additional simple trick is to take advantage of Transparent command (Transparency tool);


Important Notes:
"Every object bitmap, before given any effect, you should do Convert to Bitmap first, its location in the Menu Bar sub menu Bitmap, check the Transparent Background"


Copy-Paste the original object, give the effect of blur on the Menu Bar> select Bitmaps> Blur> Gaussian Blur, so there doalog box set radius such as 3 and click OK, then the result like the picture above;


Selection of the second image and select Transparency tool in the Toolbox, and then drag the cursor point object image and set its properties up as shown below, then the selection two objects, and press C and E on the keyboard .


So that the results would correspond with what we expect as shown below;


Examples of other images with the same trick;


Sunday, March 17, 2013

The Impossible Object Design

Try to look carefully for a moment! .... ok .. about things like this image in a state of what's not real, think for yourself ....


Hehehe ... weird right ..!
How to make this very simple, there are two images of the same object, try if we slide down one of the object ....


We continue to waste one of them, then just like this picture;


If we dispose of gradation as below picture, easy right .. we just create one object and then we copy and in the Mirror, and then we combine .... finished ...


Creating Mirror Effect with CorelDRAW


This tutorial is not about how to create vector images of cars, but more emphasized on creating a shadow effect on car glass, which in this tutorial titled Creating Mirror Effect with CorelDRAW, why mirror effect? .. because as if the car glass is a shadow that is around the car.

Suppose we are going to make a mirror image on car glass below;


We will discuss the effects produced, as shown below;


STEP ONE;
Prepare a picture bitmap object, eg photo of tall buildings like this;


Next create Sphere effect: on the Menu Bar -> select Bitmaps -> 3D Effects -> select Sphere ... set the dialog box as shown below;


The result will be as shown below;


Next on the Menu Bar -> select Bitmaps -> 3D Effects -> select Perspective ... set the dialog box as shown below;


The result will be as shown below, the first step is completed;


STEP TWO;
Copy / paste object car glass, remove the color contents (fill) by clicking on the Color Pallete cross and put yellow on the outline so that seems clear;


Further position the object that we created earlier put under glass by press Ctrl + PageDown on the keyboard, and then select both the object and then click the icon on the Property Bar and dump Intersect two objects, so the only remaining object Intersect proceeds;


The results are as shown below after we give Transparent effects in the Toolbox;


The result is like this;


Rather minimized zoom;


Friday, March 15, 2013

Creating Water Ripples Effect and Reflection, using CorelDRAW


In this CorelDRAW tutorial, we will learn how to easily add water reflection effects and realistic water ripples into any image. To create this effect with CorelDRAW is very easy and we can add it to any photo we like, even though the image we had no water at all objects in it. In this tutorial let us together create a water reflection effect and water ripple effect.

The following photos are original photos that will give us water reflection effects;


After the effects of water and water ripple reflection, the result will be like the picture below;


Step 1: Create a Background

for background, we create an object box with the Rectangle tool located in the toolbox, and we give a black color by clicking on the Color Palette on the choice of black.


Furthermore Import photos and put into position on top of the background black box.


Step 2: Duplicate and Mirror Attractions Photos


Then duplicate the transformations, this feature is located on the Menu Bar> Arrange> Transformations> and select the Scale and mirror or the short way we can press Alt + F9 on the keyboard and the docker command box set as shown below in;


After we set as above, the result is as shown below.


Step 3: Provide Transparent Effect On Photo Attractions

The next selection on the duplicated object image and select Transparency tool in the Toolbox;


Move the pointer over the object image and drag in the direction diagonal to the bottom, so it will create a transparent effect as shown in the figure below;


Step 4: Giving Water Ripple Effect In Attraction Pictures

To make the water ripple effect that could use the positioning features Ripple on Menu Bar> Bitmaps> Distort> Ripple select ...


Set the dialog box by dragging the slider and click preview to see the display temporarily, If it is felt suitable enough we hoped click OK.


So the final result will be like the picture below.


The following is another example of the application of the same effects on different images. Things change here is the reflection effect only adds a portion of the original image and everything is done in the same way.


Creating the effect of ripped paper


There are times when we need a ripped paper effect to embellish designs we've created, just to make it look 3D so we look lifelike design, this tutorial inspired logo CorelDRAW X3 (chameleon crashed into the paper), and to create with CorelDRAW simple steps ;

For example, as shown below;


As do the following;
Make object box with the Rectangle tool (F6)


Next create a free object Freehand tool (F5)


cut the object thats not needed, as the object is the object of the first pieces we create by using the menu Trim


Create a gradient with the Interactive Fill tool (G), set up in such a way that all the rips object


Furthermore, the first free object we created are colored black with Color Pallete, and give a transparent effect


Completed, the images we've looked seem real, like a pack of paper torn out deliberately to see the state of it .....

Wednesday, March 13, 2013

Creating Rainbow Effect with CorelDRAW

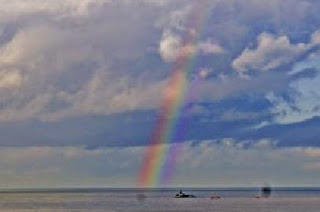
To create a rainbow, here most of us use the Drop Shadow tool to create the effect, and that we will create a rainbow effect is as shown below;


The steps are as follows;
1. create a rectangular box with Ractangle tool in the Toolbox

duplicate using Transformations -> Position for more rapid

Select all the objects and click once again so that the indicator changes to an arrow


The middle of the scroll arrows to the right
The result is


Give color from the Color Palette


Then give a shadow effect to the Drop Shadow tool in the Toolbox, and then on the Property Bar set the Shadow Color, Opacity type the numbers 100 ...


Once the process is complete, remove the Shadow effect to the original object with the click Break Drop Shadow Group Apart the Menu Bar and then dispose of the original object;

And do also the other color objects one by one.


The end result as shown below, then select all the objects and on the Menu Bar> click Convert To Bitmap ... the dialog box give checklist Transparent Background;


Then place the position on the bitmap object (eg a view) and give effect to the object transparent rainbow bitmap object by clicking the rainbow in the Toolbox select Transparency tool, then move your mouse on the object and drag or slide down, the result is as shown below;


Furthermore, give a little blur effect ...


In the dialog box, drag the slider to the right a bit or type of approximately 25.0


And the final result as shown below